Last weekend marked another huge milestone for us – getting the cladding finished! As usual with this achievement, we had an awful lot of help – Tom’s mum Jo and her partner Colin were very helpful during their stay. We were also lucky enough to have Tom’s brother Jack and his partner Jule up from Dunedin to help us out again (you may remember them from earlier posts). During the week, Tom took time off work, and between him, Jo and Colin, the North Wall was completely clad. When I arrived on Friday, the last window (our sleeping loft one) was about to be put into place. Having the manpower to lift and fit the windows and plywood cladding was immensely helpful this weekend – I’m sure Tom and I would have struggled if we had had to do it alone. Jo also focused on “feeding the troops” over the weekend, and provided us with many delicious meals (including a seemingly never-ending supply of crumble)! I’ve structured this post a little differently, focusing more on the achievements we made over the weekend rather than specific days, which may flow into each other a bit.


We were able to split into groups for lots of the weekend’s work, which made everything go much more smoothly and quickly. To start, I patched the holes in the building paper. These occurred as a result of the massive windstorm we had a few weeks ago – the scaffolding was pushed through the paper on the South Wall as the entire structure blew sideways. We had been waiting for a day when the weather was good enough to dry the paper out after the dew so the tape would stick. To patch the holes, we used the same bitumen based flashing tape we have been using for the window flashings.

While I started on this, Jack and Jule went along stapling in the blue plastic tape at intervals of 600mm where there are no studs in the frame. This is essential to ensure the insulation does not cause the paper to bulge out into the cavity when it is put in. This also turned out to be a rather irritating job as Tom took the ladder away, so it was quite difficult to pass things up and down. That afternoon, we decided the weekend’s work would go a lot quicker if I popped over to Tom’s workplace and picked up the workshop ladder to use. I was certainly not feeling very happy about being abandoned on the scaffolding with no way to get down, so was quite happy to source a second one!


The next day, Jack and Jule moved onto upturning the roof iron above the South Wall. This was achieved using a special tool and will allow the rainwater to flow nicely down the roof and into the guttering on the other side. They then moved on to cladding the South Wall. They did a wonderful job on this – as we commented afterwards, they are the only people working on the house so far that actually have a higher standard than Tom and I! They spent a lot of time lining up the grooves perfectly between the top and bottom layer of plywood – so whenever I feel my ‘perfectionist side’ needs soothing, I will be able to pop out and have a look!


The focus of Tom and Colin (joined by me after I’d completed the patching) was to clad the East and West walls. These two, although smaller, were a little more tricky, as there are two windows per wall that have to be cut out, and the West wall has a window at flashing height. This involved taking a series of measurements, cutting the flashing, and fitting the flashing around the windows. Then, we discovered the cladding was not actually going to fit when we tried to push it in place around two windows and the flashing – with all hands on deck trying to jimmy it into place! We ended up taking extra cuts out of both the plywood and flashing to get everything to fit – definitely the most complex part of the whole process! For most of the cladding around the windows, the process was much more straightforward – we simply had to cut a window shaped hole in the sheet, with an extra “flashing cut” to allow the plywood to slide in nicely around the flashing. In most instances, we found the flashing had pulled the window a little too far in, so a bit of maneuvering with a screwdriver was needed to get the plywood into place nicely. However, the weekend ran mostly like clockwork, with the cladding all wrapped up by Sunday evening! We do need to put in some extra screws to ensure the cladding is well fixed into place. After we do this, we will be able to take down the internal bracing and make a start on the interior! We also have to come up with a flashing for the corners of the exterior, as we just made a cut down the edge of the ply and butted the two sheets together. And of course, there is currently still no guttering in place, so this is a job we will have to think about at some stage too. However, now the cladding is in place and we can take down the bracing, we have the option to work inside on rainy days!


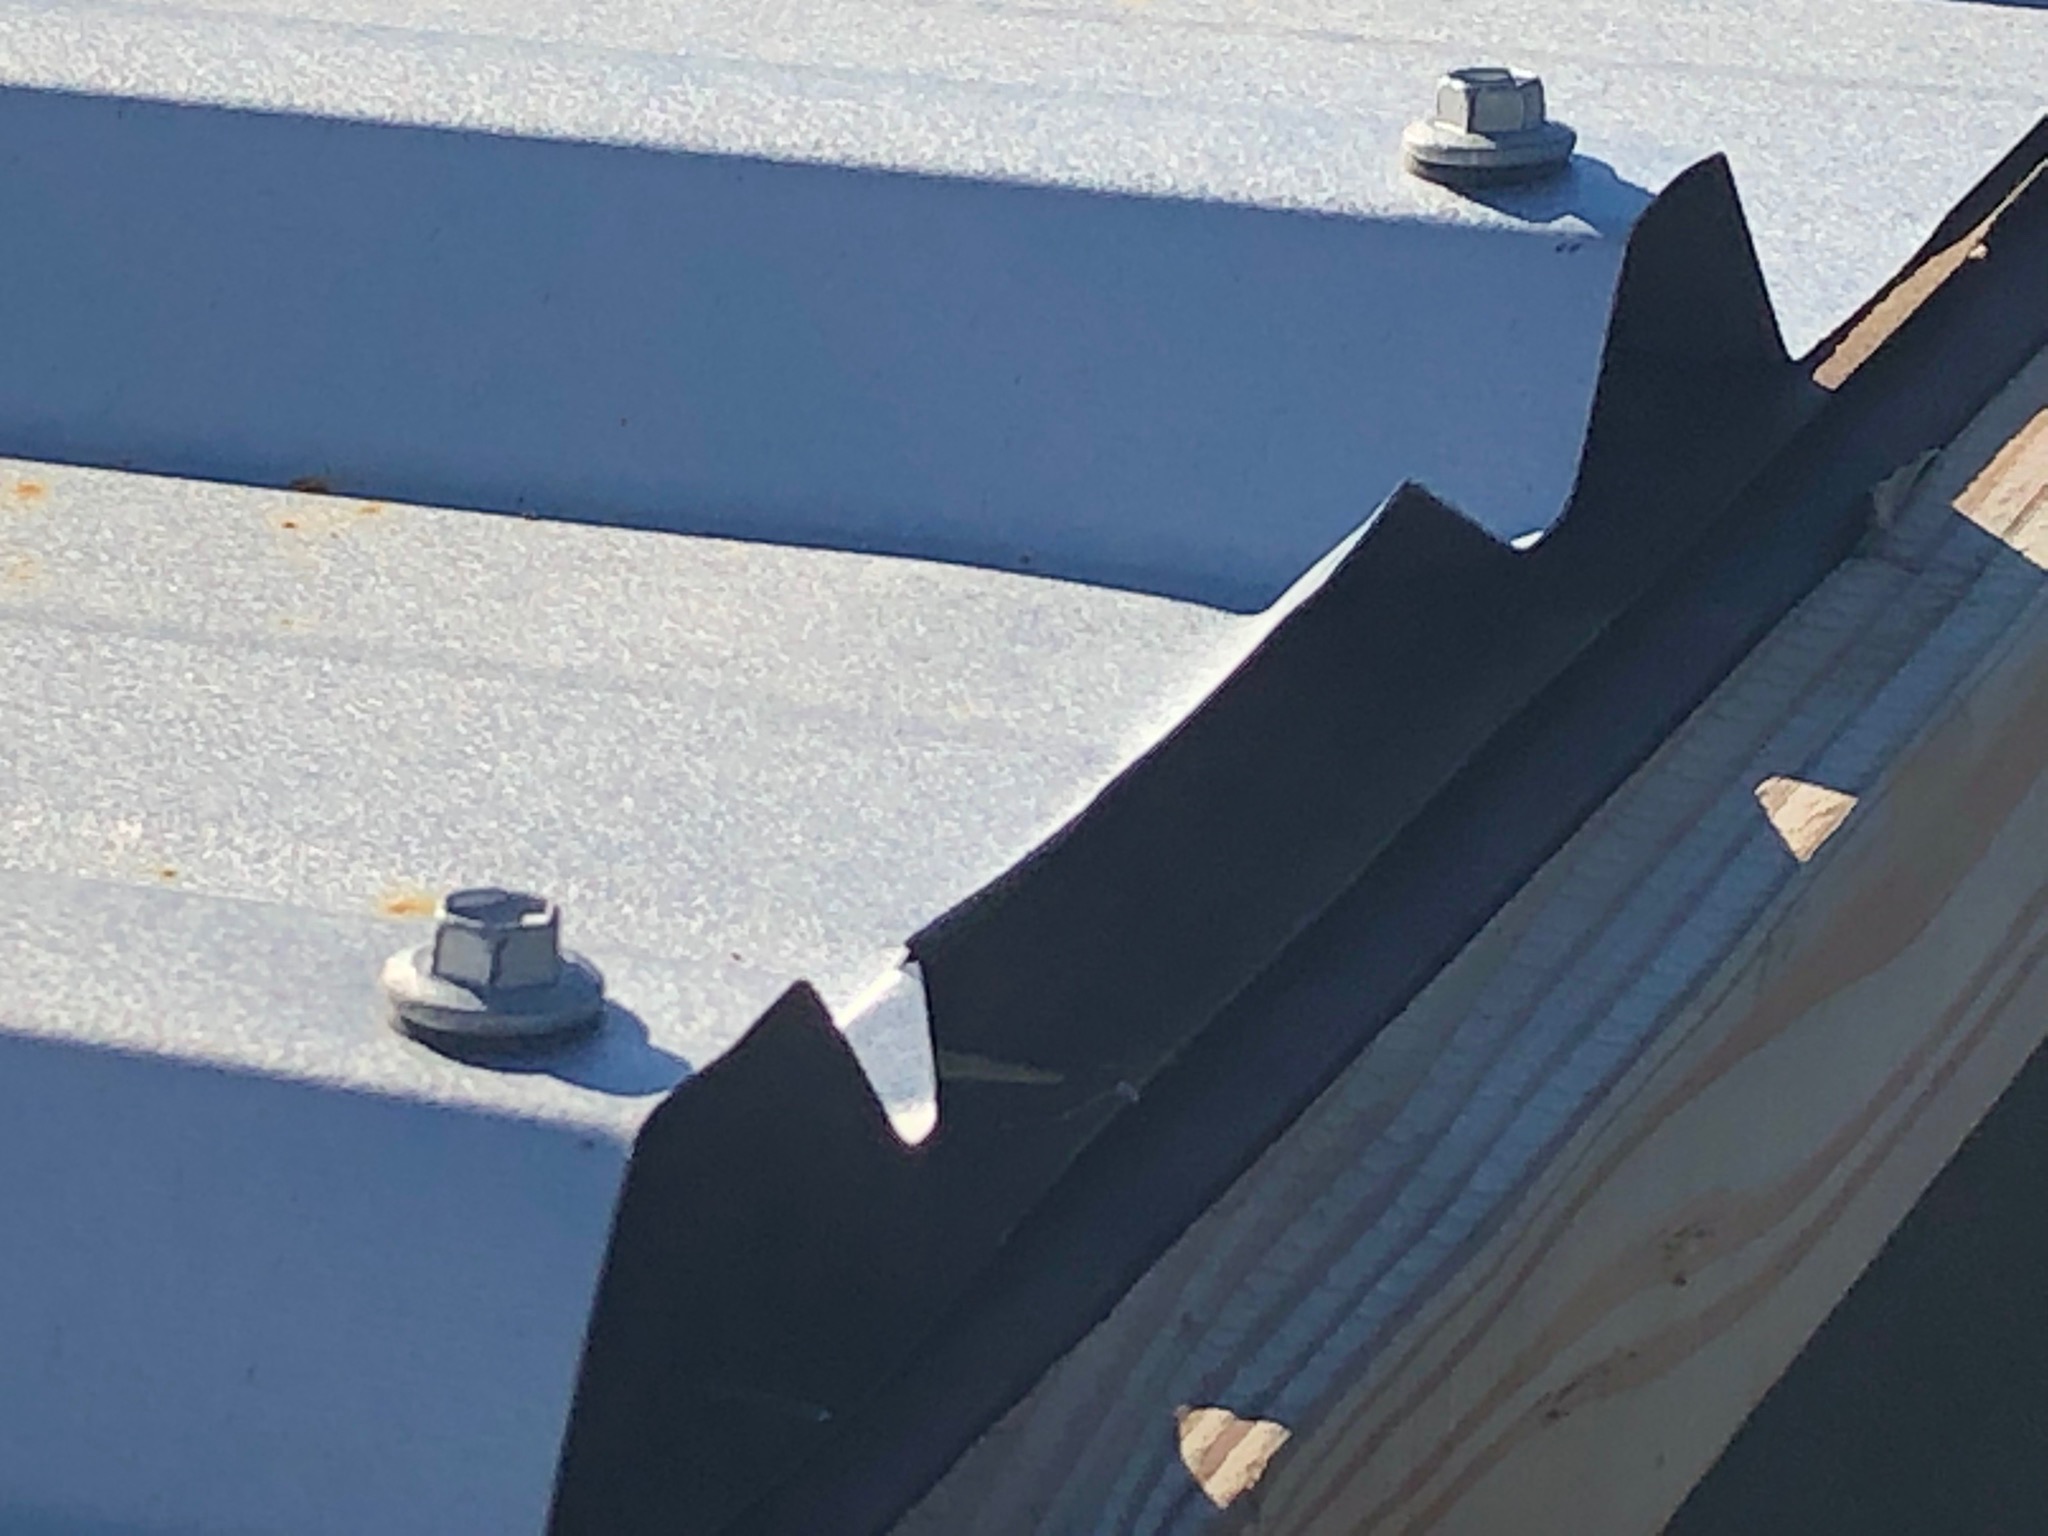
The cuts made in the flashing to fit the plywood 
The piece of plywood we managed to slot around two windows
I was also working on getting the window latches on this weekend, so we can open and close the windows as we wish. This turned out to be more complex than originally anticipated, as we had received the wrong size screws with the windows! After a bit of head scratching, we purchased the right size screws and successfully fitted one latch. We will hopefully be able to fit the others easily at a later date now we know what the issue is.

Side note: I have just been asked by my flatmate “What is cladding?'”
According to Google dictionary; this is “a covering or coating on a structure or material”. Or, in my much more elegant terminology “the wood stuff on the outside”.
