Figuring things out and a lot of grinding

This week involved a lot of figuring things out, so it feels as though we didn’t get an awful lot done at the site. However, the thought processes and discussions we have had have allowed us to develop the next steps in the sequence of things, which is very important in terms of logistics. For instance, leaving the cladding process for too long means that your building paper, insulation and framing may get wet, or the paper may sustain UV damage from the sun.(1) If the roof fascia or barge board is put on before the cladding, this can lead to insufficient water tightness of the building.(1) So, long story short; we needed to think about cladding the place. The first issue with this: the scaffolding Tom finished putting up the week before is attached to the frame, so this would need to be moved to put the cladding on. He did this over the course of the weekend, spending yet more time digging holes in the stony, unforgiving ground to put pegs into, and attaching the scaffolding to these.

The second issue was the windows and doors. Because we have decided that we need a cavity, the windows will not be mounted directly into the frame, due to the gap caused by said cavity. This means you need to put in a window support bar, which takes the weight of the window so it is not supported by the cladding. As far as I am aware, the window supports cannot just be purchased from a hardware store, you have to get these from a window manufacturer. This is one of the things we will have to look into over the week. We also started the grinding down of the windows this weekend. There is a lip on the inside frame which will make cladding and inserting the windows an absolute pain, so we decided to take this off with an angle grinder. Tom did the first cut, which looked great. I attempted the second one, which was…. less great. In fact, trending more towards terrible. Given my lack of experience with an angle grinder (the first time I had used one was the day before, when I’d ground off the nails sticking out of the frame so the plywood would go on nicely), I gave myself 1mm of grace, which turned out to be a very good idea! Luckily, Tom was able to come along and fix my wonky line using a sanding disk rather than a cutting disk on the grinder. I decided to employ a similar tactic with the other cuts, rather than rely on being precise with the cuts (which turned out to be an extremely good idea).

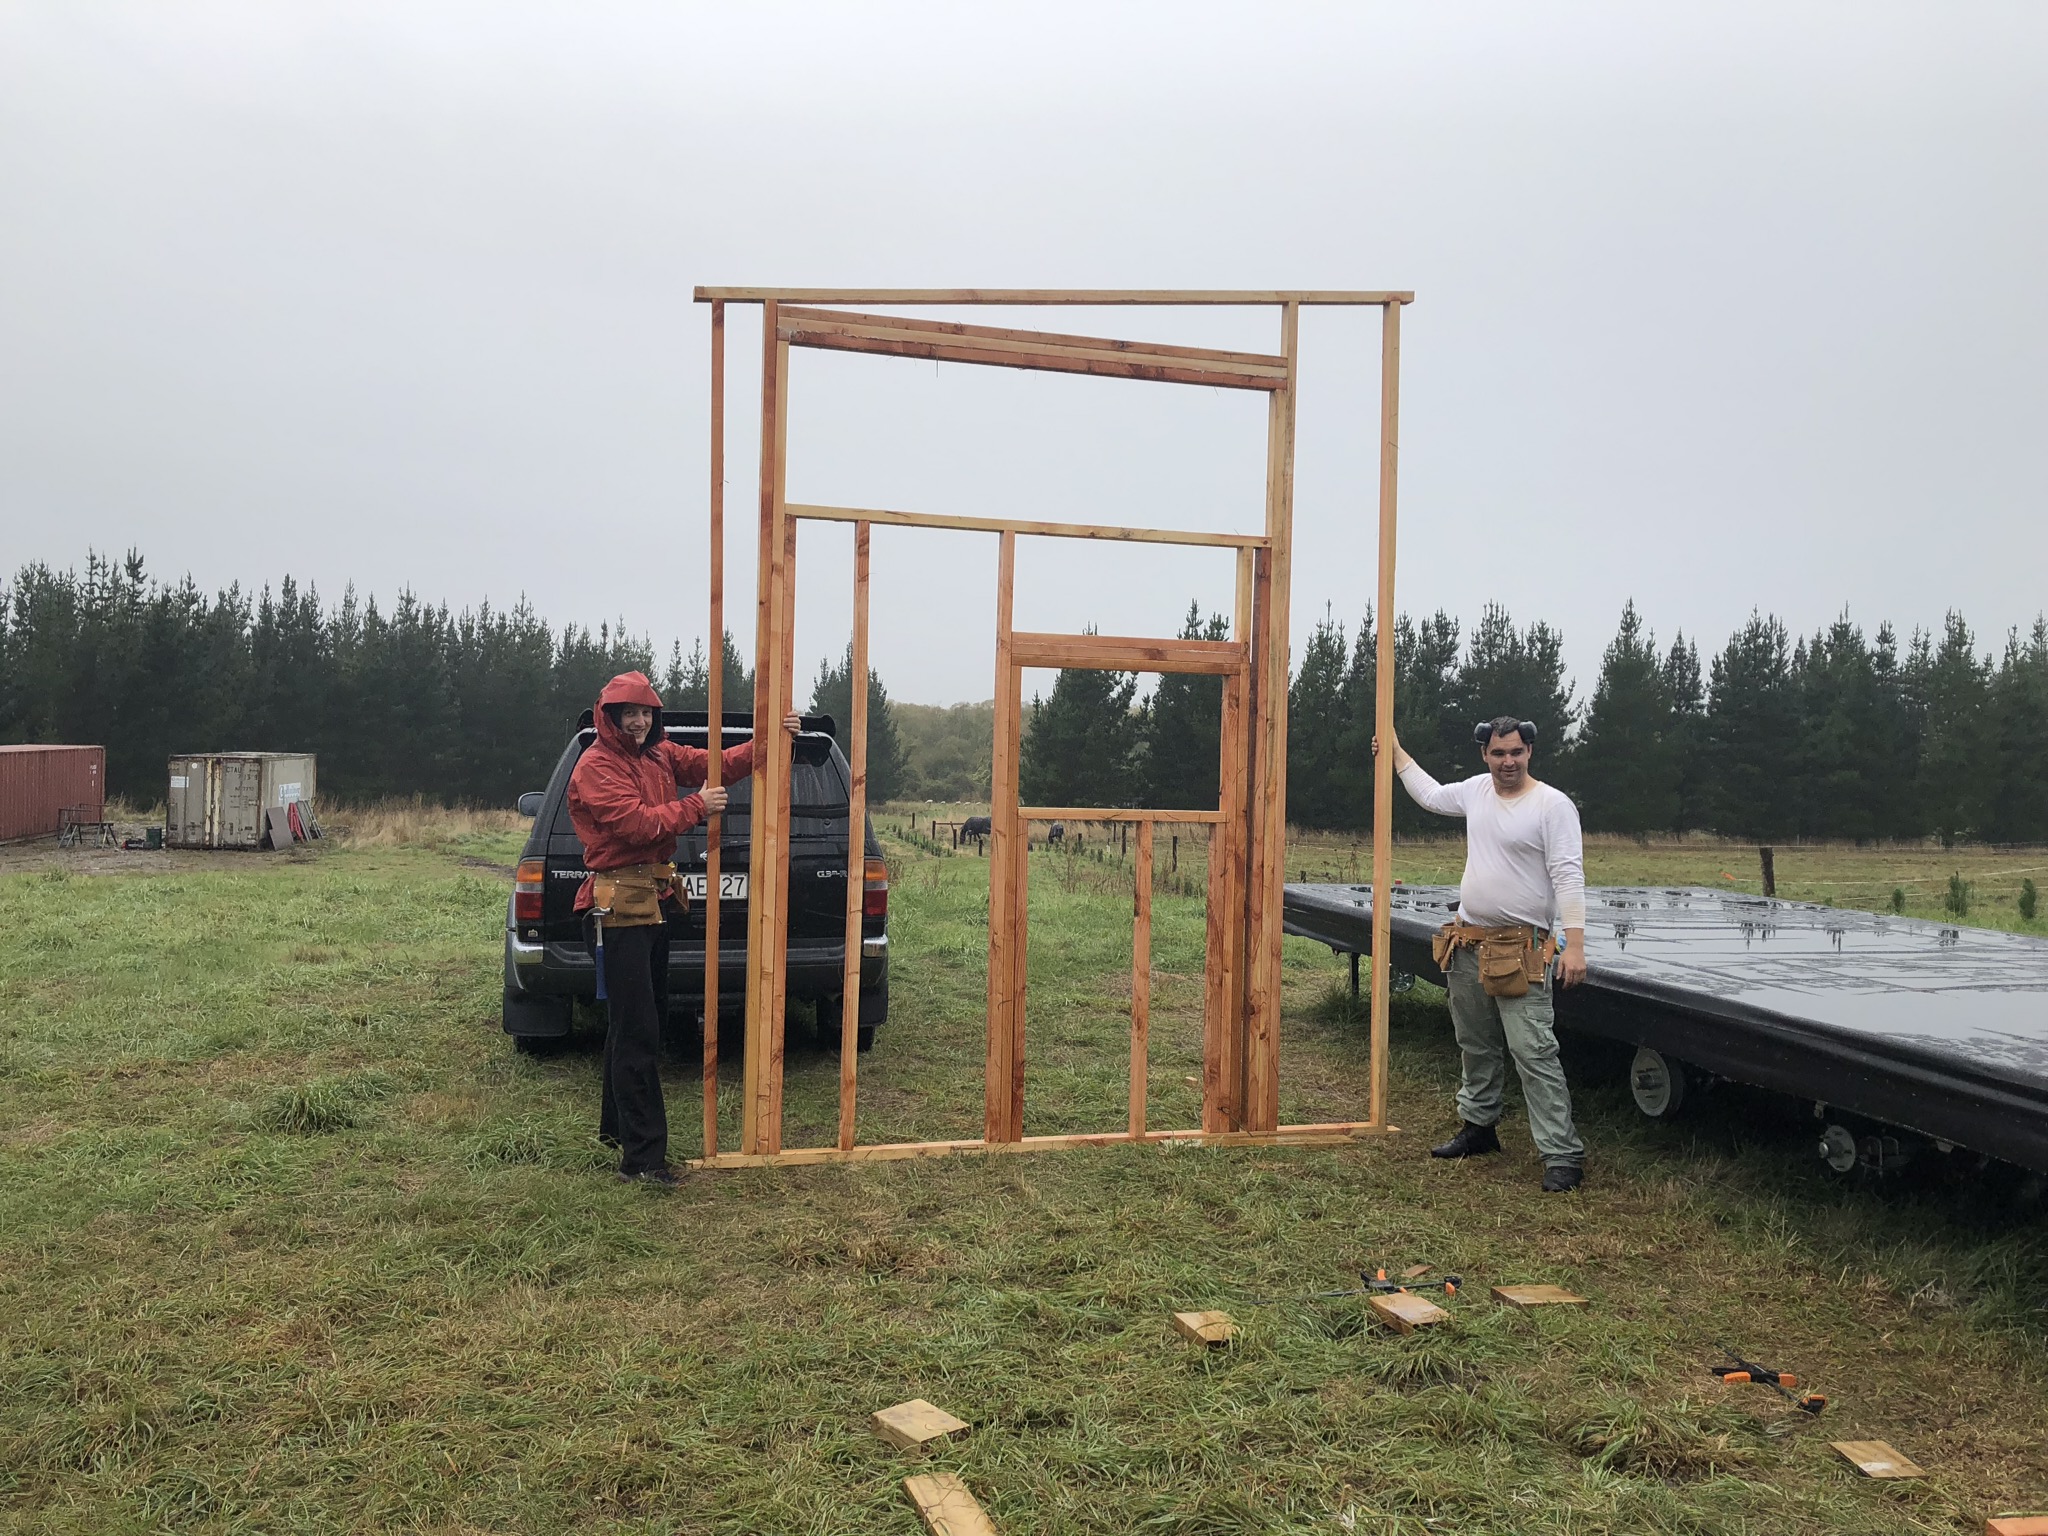
We also inserted the windows into the frame to see how they would fit once the plywood is fitted. There was enough room for us to fit a small reveal, with the window able to be tacked onto the framing with sufficient stability. Along with the support bar, this should be more than adequate strengthening to hold up the windows.

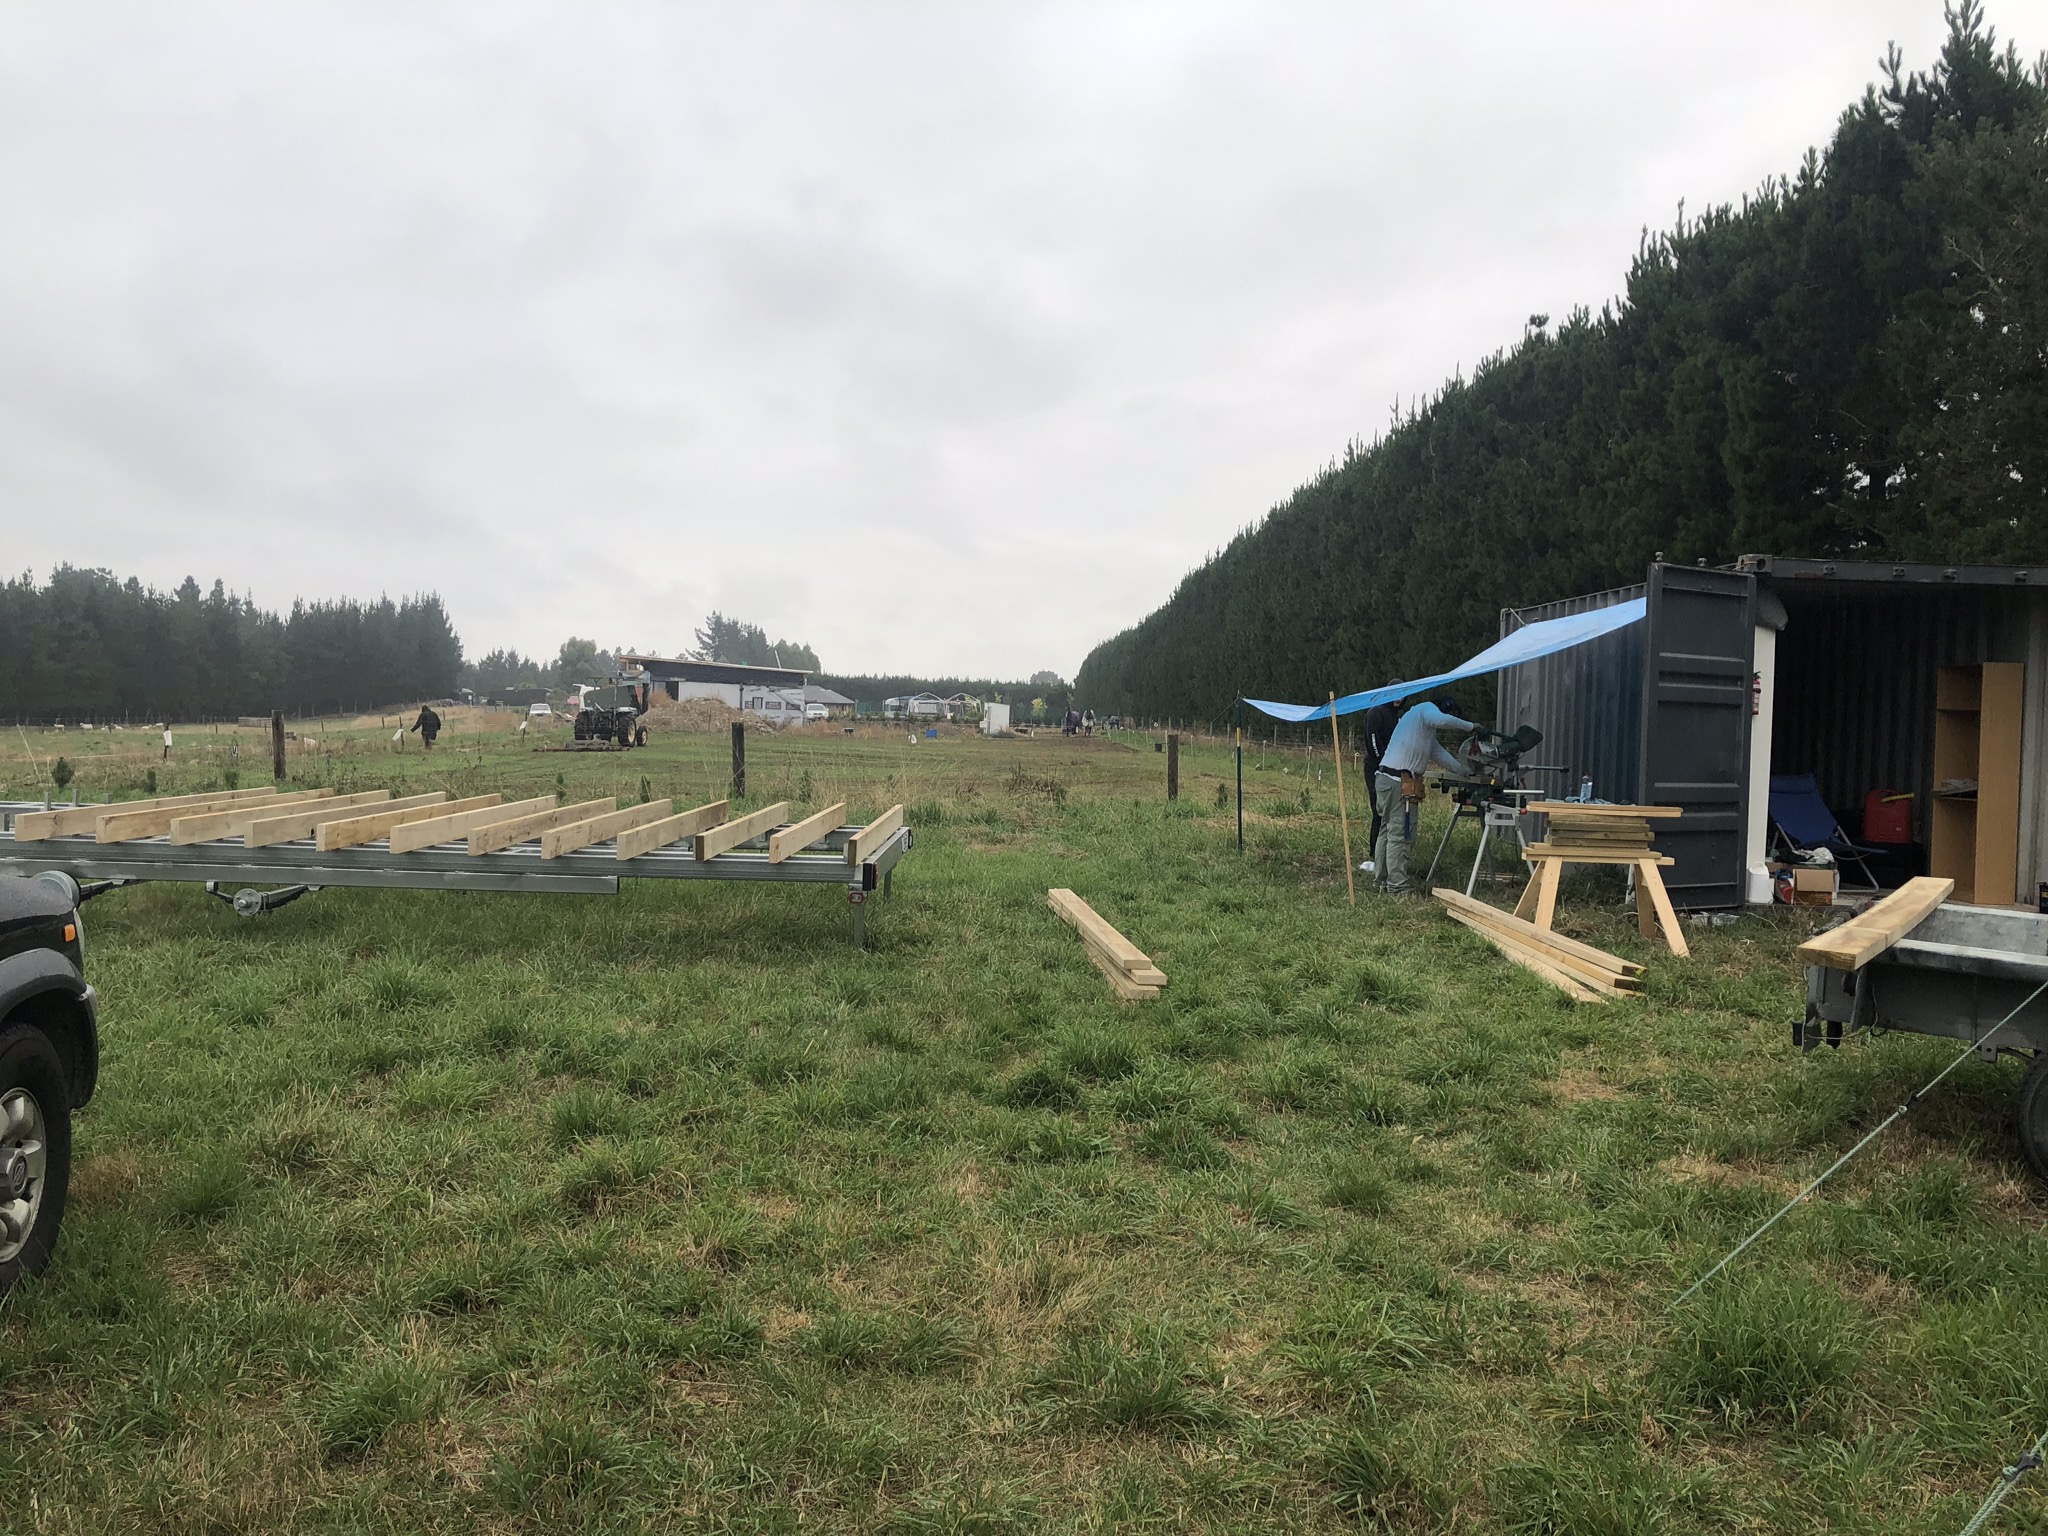
The other thing we did over the weekend was to get a quote for a roof. We went to a company called Metalcraft for this, simply because they were the only ones open when we got around to it at 4pm on Friday afternoon. The sales rep was very nice, despite us turning up at what must have been perilously close to home time with very little idea what we were after. Nevertheless, we have a quote for a roof coming with a trapezoidal cut, due to the relatively low pitch of approximately 6 degrees, and square guttering which should be good for when we move the trailer (based on nothing more scientific than the fact that they sit closer in, and look more ‘streamlined’ than the round ones). We also forgot to tell the sales rep that we had a chimney going in, so some examination of the plans to determine exactly where this will go is needed. I got some color samples to take away and look at too. I am currently coming to terms with the fact that the most environmentally friendly color is not the most aesthetically pleasing one – originally, my plan was for a dark, slate colored roof. However, light rooves reflect solar energy from the sun back into the atmosphere, which also contributes to keeping the house cooler in warm temperatures. They also can keep the house warmer, by emitting less heat as radiation than dark colors (although slightly less energy may be absorbed on sunny winter days, as most will be reflected). I am currently reevaluating my design plans to incorporate the lighter roof color while matching with cladding. At least, no matter what color it is, the product is Coloursteel, which comes with a quality guarantee and warranty.

Colour choices…

Tom also did some insulating in the caravan over the course of the weekend. We arrived at the site at about 10.30pm on Friday night, after ordering the roof, and picking up some spare pallets on the side of the road on the way home. It was absolutely freezing when we arrived, and, despite putting the heater on when we got there, neither of us really warmed up over the course of the night. This ended up with Tom turning on the heater at 6am on Saturday morning to warm us up. That evening, he pilfered some of the spare Batts purchased for the walls, and packed them into the storage space underneath the caravan bed. Although Saturday was a slightly warmer night, I felt much toastier after his endeavors. Hopefully we will be able to survive caravan in winter – although I suppose if not, it should at least motivate us to get the house finished faster!

Reference:

(1) http://www.buildmagazine.org.nz/articles/show/getting-the-sequence-right/

A Beautiful Beam and the Last of the Framing

After our Easter work-a-thon, Tom and I went back to work the following Tuesday, while Steve continued on at the site, with Jack and Jule helping out on the Tuesday morning before heading home. For me, this meant a busy short week between public holidays, although, luckily given that I no longer have to work Fridays, only a two day week was on the cards. For Tom, he lasted until about lunchtime on the Tuesday, before deciding to head back to the site and help Steve. By the time I got back to the caravan on Tuesday evening, they had finished framing up the first section of the roof.

On Wednesday, Tom took another day off and continued building with Steve. By this point, I had started with a cold, so I decided after working and going to the gym with Bella, that she and I would stay at the flat that night as to not spread my germs further sleeping in the tiny caravan. By the time we got back to the site on Thursday morning, massive changes had occurred! The framing for the roof was finished, with extra braces put in cross-ways, and around each beam of wood. The cross-length beams that would hold the mezzanine floor had been installed. And, the beautiful beam of macrocarpa that Steve had brought down from his forestry block had been installed. To this feature, I confess no input. Tom has been talking about putting beams up since we started the plan. I assumed it was one of the someone vague design plans he had made for the place, which would not come to fruition without my input. I was wrong: he was determined on the beam front. Indeed, if I had seen the log before it had been de-barked and installed, I confess I would have been very reluctant about its presence in our home. As it were, it was set firmly in place while I was working, and, it looked good. Better than good actually, I am confident this will be one of the main aesthetic features of our home.

When we arrived, it seemed Steve and Tom had recently vacated a couple of deckchairs set out on the trailer; Tom proudly informed me that they had eaten breakfast “in the lounge”. It was certainly a beautiful day for it. Without further delay, we commenced working. I nailed extra bracing on the window lattices, while Tom and Steve built some makeshift scaffolding to hold onto whilst we are building.

Another thing we had to do was to move the kitchen window down slightly. For those of you that have been following along, you may remember that to place the kitchen window, we simply held it up to a height that we liked and installed it there. This, it turned out, was a mistake. Unsurprisingly, it is always best to have a plan – we had placed the top of the window exactly where the joists for the mezzanine floor had to go in. This meant the entire window had to be moved down by a matter of a mere 50mm. While Tom was doing this, and finishing off the scaffolding, I got to work on the beam. I sanded the knots and peeled off some more of the bark that Tom didn’t quite get finished. I decided to leave some bits of bark on, to create a more interesting colour complex on the beam. While I was doing this, Tom made some improvements on the scaffolding. He nailed some beams into place, while re-planting some of the base beams, which were a bit wobbly. With a resounding “that’s not going anywhere!” uttered by self-satisfied men on completion of projects dedicated to securing things everywhere, he was finished. I was then summoned to try out the new improved scaffolding – after some tentative jumping up and down, it was deemed sufficiently secure.

On Friday, Tom worked to make up for the day on Wednesday that he took off. I still wasn’t feeling 100%, so decided to have a quiet day at home (which ended up spanning into Saturday – we were both pretty exhausted from the week just been, and Tom appreciated having some quiet time with his computer games, and me with my book, on Saturday). These two days ended up being productive for the next planning stage of the operation. On Friday, I spent some time researching whether we needed to put a wall cavity into the house. This is a gap between the building paper (which we will wrap the timber frame in) and the external cladding, designed to let out any water or condensation which may make its way in. To work out the necessity of a cavity in any property, there is a risk management table available through the government building website, along with a comprehensive guide as to how to work out the risk of moisture entering any building. Having worked out our particular risk profile, it was determined that our tiny house would need a cavity installed (mostly due to absence of eaves in the roof), so we came up with a rough plan of how we were going to do this, and made a list of supplies needed. During my research, I also came across some valuable roofing information. We had planned on using corrugated iron for our roof, however, I learned that the minimum pitch (or angle) of a roof to use this is 8 degrees. Our roof pitch is only 5.7 degrees. We will have to use trapezoidal roofing iron instead, to allow for water to flow off the roof with as much ease as possible. This should not be a problem, as manufacturers of the roofing kits can supply trapezoidal kits instead. Another thing I did during these days was more work on my wine barrel project – having finished the cleanup and sanding processes, I eventually begun to apply the first coat of oil. I am super excited with how this is turning out, and can’t wait to share a comprehensive start to finish post!

For those interested, here are the links to the documents we used to determine risk of moisture and help us work out that we needed to put in a cavity:

https://www.building.govt.nz/building-code-compliance/e-moisture/e2-external-moisture/

Click to access e2-riskmatrix.pdf

Here is the link we will use when constructing our cavity:

Click to access constructing-cavities.pdf

Easter Work-a-thon

We had amazing progress over Easter weekend! Tom’s father and little sister came down to help us, along with his brother and partner. The first thing was to add extra bracing and dwangs to that pesky East Wall we keep thinking we have finished. Tom’s brother, Jack and his partner Jule started on this job (after a brave early morning start following an after midnight arrival from Dunedin), while Tom and his father, Steve, discussed plans for the South Wall. The construction of said wall could then begin. This was much the same as the East Wall, creating vertical studs and nailing them onto the bottom plate, and lintels for the windows (for those that have been following our window dilemma, the plan is just to fit normal window gaps and grind a bit off the windows so we can fit reveals). Then the horizontal dwangs were cut. At this point, it was getting dark, so we called it a day. The next morning, the dwangs were nailed in (which, incidentally, is a real pain in the ass job, especially given the wood we are using, which is quite hard and likely to bend your nail). While we did this, Jack and Jule built us a fabulous temporary sink which will make life in the caravan a lot more pleasant and ensure the ground by the tap is no longer a soggy mess.

After lunch, we had a monumental moment – the first wall went up on the trailer! We all held it into place while Steve nailed it in.

Then, we continued on, starting yet another wall before dinner. Sunday morning was cold, and absolutely chucking it down. Tom and Jack spent a proportion of the morning organizing some electricity for the caravan, so we could dispense with our previous method of having to keep the window open to poke an extension cord through. This involved many blown fuses and curses from the boys, but, they eventually prevailed. Then I took Tom’s sister, Bella home for a while so she could have a respite from the confines of the caravan. While at home, I began the process of restoring the wine barrels – there will be more to follow on this in a later post. Bella made the most of the WiFi to ease her teenage deprivation of being away from internet. While we were away, the others bravely soldiered on through the rain, finishing and putting up two more walls!

On Monday, we had slightly better weather – the rain had reduced to a slight, petulant drizzle. By mid-morning, it had come nice again, with even a hint of sunshine poking through! Jack and Jule started their day by discovering that the wall they were about to work on (one of the ones erected on the trailer) was no longer level. This, it was discovered, was due to the ground underneath the trailer sinking – the joys of building on an uneven surface! Having re-leveled the trailer and attempting to straighten the South Wall, which was about 6mm out of whack, we succeeded in pulling the structure 14mm out of line in the other direction. At this point, we decided it was probably best to leave it the way it was until we had erected all four walls (aka hope putting in the other wall would straighten things out and solve our problems for us).

While Tom, Steve and I were working on the fourth wall, Jack and Jule had yet another frustrating job – fixing the corner of the South and East walls into place. This created a series of challenges, including the fact that they would cut a specific width piece of wood, which would then compress and not actually fit perfectly into the gap they had measured out. The hammering also proved to be a challenge, with Tom providing custom-made scaffolding as required…

Eventually, despite minor setbacks, we had the fourth wall finished and put up with the others. The structure fit together perfectly (always a relief!). Tom and I were finally able to walk around inside the main structure of our home, which was a highly gratifying moment. At this moment, it doesn’t really look like a “tiny home” – the structure looks more than big enough for us! The walls being up make the place look really big – although, after speaking to Jack, who built his own house, I am assured that this illusion will disappear when we start building the internal walls. For the moment though, we remain ecstatic at the amount of space we’ve created purely for us.

After putting up the final wall, we had to fit the corners together, filling in any spaces with spare blocks, as Jack and Jule did on our more troublesome Southeast corner. The corners were joined together at the top using nail plates – pieces of metal with spikes on the bottom which dig into the wood and hold it together. The final thing we did on Monday was to fit beams into the top of the walls. These beams are integral for supporting the main structure and keeping it square, and holding up the roof. The beams are made from two pieces of wood at 190mm by 45mm, nailed and glued together to make one piece sized 190mm x 90mm. We lifted the beams together, passing them up between people at different heights, until we got them up to the height at which they could slot into the pre-cut gap. At this point, we were losing the light again, so decided to call it a day.

We were so satisfied with the amount of work that was done over the weekend. The progress we have made on the house is amazing, and once again, we were very lucky to have people willing to give up their time and expertise to help us. Jack and Jule headed back to Dunedin on the Tuesday after Easter, while Steve and Bella will stay with us until the Friday to carry on with the project while Tom and I are at work. As well as the main structural things we got finished over the weekend, it was good to get some odd jobs finished, such as the power to the caravan, and the addition of the outdoor sink. For now, all that remains is for Tom and I to go back to work and hope Steve gets the roof on for us in the meantime!

Wine Barrels and Wall Re-parallels

This week, I began some new working hours. Tom has been working Monday – Thursday for about a year now, and has been urging me to do the same. Luckily, I have a very generous boss, who was able to make this happen for me. For the foreseeable future, this means we have an extra day to build, and, after that, more time for adventures! Living tiny will help us to sustain this work-life balance (with focus on the life). The fact that I know I won’t have to be stuck paying off a massive mortgage made me a lot more comfortable asking for reduced working hours.

We were planning on heading out to the tiny house for my first Friday of freedom, however, the weather had other plans. It was another day of freezing rain. Instead, we decided to visit some salvage yards, as well as popping into Bunnings to get some price comparisons for brand new items. At the Eco store, I found a small corner desk which is perfect for typing and writing at. I’m not sure at this stage if it will fit into the tiny house, but it is perfect for working at just at the moment. Then, at the salvage yard we went to, we made the ultimate find – two (fairly) cheap wine barrels! This is exactly what I’d been looking for for a bathroom project, and since we had found the two together, it would’ve been madness not to take both of them (even though technically I only needed one, you can never have too many wine barrels!).

On Saturday, the weather was thankfully much better. We headed out to the site for the day with more helpers, our friends Saira (pronounced Say-Rah) and Nick. When we got there, we split off into separate projects. Saira, Nick and I were putting in extra reinforcements to the wall we finished the following weekend, in order to attach the roof purlin hangers (which the roof purlins attach onto when we construct the roof). Tom was starting on the framing of the windows. However, it quickly became apparent that we had messed something up the previous weekend- the wall wasn’t fully square. This was, thankfully, an easy fix, we simply had to move the sloped roof beam over slightly. After this was fixed, we measured and cut more jack studs (a lot smaller this time) to go at 600mm intervals along the roof beam. The blocks for the purlin hangers would slot in between these. The jack studs had to be cut to match the angle of the roof, at 5.7 degrees. Then it was time to cut the blocks. The first section was trickiest to cut, as the pieces of timber we had were too big to slot into the tiny gap between the top window and the roof. Lots of careful measuring and angled cuts with the table saw were required. After that, the other sections were relatively easy to cut, as they were just to be nailed up against the roof beam. However, then Tom came along and told us we had cut them the wrong way, and proceeded to fix them for us. We had arranged them skinny side up, which wouldn’t have been enough material for the purlin hangers to join on to. We had to re-cut the angle cuts on some fresh pieces of timber which then got nailed in.

Meanwhile, Tom had been working on the windows. He managed to make a reveal for the top section without too much trouble, however, when he got to the sides and bottom, things became a lot more complicated. Due to the shape of the window, he would have to make lots of tiny, angled cuts to get a reveal to fit. Instead, he is going to look into simply grinding the tricky bits off the side of the window so he can construct ones that fit more easily (and yes, I admit I am a smidge nervous about grinding up brand new windows).

The final thing we did was cut the bottom plate for the South Wall. Since we don’t have any 8m pieces of timber, we used two pieces with slots cut in the middle so they could slot into each other easily. As with the East Wall, there were also slots cut into the end sections for the other walls to slide into. We couldn’t continue with the wall after the bottom plate, as Tom needs to make an elevation plan, which cannot happen until he knows the window size, which cannot happen until he successfully fits reveals. Lesson learned: do not buy bargain windows without doing research first!

So, this week’s progress was not monumental, we did a lot of figuring things out, with more still to come. The rest of the weekend we gave ourselves a little break – we had Joe’s leaving party on Saturday night, so didn’t stay over this weekend. The windows are still our biggest ongoing issue – until we get these sorted, it will be impossible to continue with the walls. Hopefully we can come up with something by next weekend!

The East Wall

This weekend dawned cold and damp, with the promise of more rain to come. When we arrived at the site, we saw what a great idea it had been putting down the polythene sheet as a LOT of water had accumulated on top of it. Joe brushed it down while Tom set up the work site. The weekend’s objective was to complete the East Wall.

Polythene protection is never a bad idea…

The first thing we had to do was cut the bottom plate for the wall. Next, Tom had to figure out where all the studs were to be located to hold the windows, top floor and connection to the adjoining wall (California corner). He also cut a lap joint in the bottom plate to create a stronger connection to the other walls. He decided to have a go on a practice piece of wood first. Then, it begun to rain, so we had to cover up the power tools and retire inside the caravan (and for those who make it to the end of this post, you will notice a common theme). The joys of an all-outdoor worksite. Upon trying to make a cup of tea inside, we discovered that the matches had become damp in the rain over the week (of course the caravan had one tiny leak right over the particular spot we’d stored then in). Luckily, Tom was on the job with his battery pack and jumper leads, to make a spark while Joe quickly turned the gas on. Don’t try this at home, kids.

In the next weather break, Tom did the cuts into the bottom plate, while Joe pulled off the old wooden framing that was around our secondhand kitchen window, being very careful not to damage the reveals underneath (which he achieved with about an 80% success rate). The wood was nailed in very hard, so in lieu of a crowbar, a shovel was employed to wrench the frames off. The small bit of reveal that was pried off with one of the frames will be easily re-attached with some wood glue and painted over. Unfortunately, the rain started up again fairly quickly, so it was time for another retreat inside, this time for quite a while. We decided to make some toasties and see if the weather eased off. We also had to do some figuring out of the lengths of the studs we had to cut. To do this, we had to employ some high school maths and crack out SOH-CAH-TOA, which was a very deep delve into the past! We knew the angle of the roof and the distance of one of the sides, so we were able to use trigonometry to work out the distance of the other side, aka our stud length.

We also had to figure out where the windows went in, in order to build a sturdy frame for them to sit in. To do this, you need 3 studs on each side – one for the bottom frame, on for the top, and a jack stud in between for added support. Tom’s dad had kindly calculated where the top window was going to fit for us – JUST underneath the roof joist on the short side of the roof! The kitchen window we simply held up about eye height where we wanted to position it and measured it into the frame from there. This, I am told, is one advantage of using timber framing over steel – you don’t have to have an exact plan of where to put things and can to some extent make it up as you go along. So, in between many rainstorms, we managed to get the frame laid out and ready for nailing and gluing. We were quite pleased with our progress, given that we could only use the power tools in between the rain, which was fairly torrential during some parts of the day! We had a chilly sleep in the caravan that night, and decided to bring a heater and maybe a hot water bottle and some extra blankets up with us next time.

The next morning dawned… raining again. After breakfast, it showed no sign of relenting. The boys decided to just crack on and finish the wall, nailing and gluing what they could in the rain. While they did this, I did the dishes and packed up the caravan so we could have a quick getaway when they were done. Joe and Tom got the wall finished in record time, and had it good to go for 10.30am! At this point, we decided to pack up and head home. We could have stayed on to begin the framing of the other walls, but decided we weren’t that keen to stand about in the freezing rain. Also, we still haven’t figured out how to frame our other windows – the East Wall didn’t matter as the two windows we were putting in were both the refurbished secondhand ones, not any of the new ones, which we’re still not sure quite what to do with. So, in the spirit of procrastination, we went home and watched a movie in the warm instead.

This is also the last weekend Joe will be with us for a while – he is going up to police college next weekend. The caravan will feel a little empty not having him around – we will miss him! He has been a tremendous help on the project so far, and I’m sure he will (hopefully) enjoy walking into his handiwork when he gets back!

We have a floor

This weekend saw the completion of our floor! Yay! We had a hard weekend’s work, but it is great to know the first part of our house is officially finished.

We got to the site just after 10am on Saturday morning. Tom spent the Friday before this purchasing plywood and insulation to complete the floor project. He got some seconds ply that was perfect for us. As we have a small floor space, we could just cut off the bits that weren’t so aesthetic and use the good parts of the board. We first laid out all the ply on the ground so we could pick the best bits that would be seen the most and relegate the crappier looking bits to the spaces under the cupboards and walls. This cost us $52 per sheet. The insulation was recommended by Tom’s dad, and cost us $260 for our floor space, which is 24m square. The insulation is Greenstuf by Autex industries, designed to be zero itch and made of 100% polyester. The company also has a policy for zero waste manufacturing, with a minimum of 45% recycled content. It comes in the form of a blanket, which you simply lay out and staple.

The first thing we did was to fit the plywood to the trailer and cut it down to size, using the table saw for big cuts, and the skill saw to trim the sides down. We then numbered all the bits of ply, and removed it from the trailer so we could start putting in the insulation. The ply was then flipped over and painted to protect the bottom. We had polyurethane to protect the tops and sides, but, as this is expensive, decided just to paint the bottoms to save money. We used a pot of seconds paint that Tom got from the Ecostore for $38, and turned out to be a rather nice shade of blue.

We then had a visit from our landlords who were putting in a fence at the front of the property. The landlord’s brother was with them, who happened to be a builder. He came to have a look at our project, and gave it the seal of approval so far, which was good to hear! He did give Tom a few tips, including fixing down the plywood floor with screws instead of nails, and using about a tube of wood glue per sheet, to ensure it is held down super securely. He also advised us to get a sheet of polythene to cover the floor with for the rest of the project and just build on top of it, to stop us ruining the floor by walking all over it in all weathers. We headed into Rangiora town to get screws, wood glue and a polythene sheet, along with some late lunch. We then had just enough time to come back and finish the painting before the end of the day. Tom also managed to cut a hole in the wood to run the plumbing for the kitchen sink through. This was achieved using a hole saw, he had to ask a staff member at the hardware store in order to get one long enough to cut the wood right through. He ended up going in at each side and cutting half out at a time, as it was too thick to manage all at once. Tom also tried to drill a hole into the cast iron pot we have to use as a bathroom sink using the hole saw, however, the iron was too hard, so we will have to go back to the drawing board on that one.

After this, we had somewhat run out of things to do, as we were waiting for the plywood to dry. So, we climbed onto the container for a drink and watched the sunset. The boys then stacked up the ply while I made dinner by candlelight again.

We woke on Sunday morning to a thick fog. As the main start to our day was staining the tops of the plywood sheets, we decided to stay inside, eat toasties and read our books until it had cleared, so the polyurethane could be used in better conditions. Luckily, by around 10.30, the fog started to clear into another beautiful day! Unfortunately, when we inspected the plywood sheets, they had stuck together a little, due to being a bit tacky when they were stacked the previous evening. This meant I had to give them yet another coat of paint and let this dry. Tom and Joe made a start on the insulation while I did this. They were hampered by slightly dodgy staple guns that didn’t seem to want to staple, so this was a longer process than it should’ve been, and before long, they were down to just one gun. Tom carried on with the insulating while Joe and I flipped the plywood and started to sand and stain it. These respective jobs took up most of the day. The plywood had 2 coats of polyurethane, with a sand in between each coat. The polyurethane was also VERY strong, so we took turns applying it to share the fumes between us. Once the plywood sheets were prepared, it was time to attach them to the joists. Unfortunately, Tom hadn’t expected to use his hammer drill, as we were expecting to use nails rather than screws, but, luckily, we were able to borrow one off our landlord, Phil.

To attach the plywood to the joists, we put down a LOT of wood glue (almost a tube per sheet). We then affixed the sheets with screws, set 150mm apart around the perimeter of each sheet. Next, we ran down the joins if there were any gaps with yet more glue. During these proceedings, we snapped screws, splintered bits of ply and spilt glue across the floor. It was about at this point that we decided we were definitely going to invest in some lino and carpet to cover the floor. Another thing we’d discovered was that, although we had painstakingly measured and labelled each piece of plywood at the start, for some reason they didn’t fit perfectly back into place. Another learning curve! We ended up having to take off around an extra 5mm off one of the edges to fit them all back onto the trailer. I suspect the 5mm was somewhere in the many gaps that seemed to materialise between the boards. In hindsight, we probably should have painted and coated the entirety of the boards before fixing them into place and then cutting them down to size with the skill saw. The whole process of re-fitting the pieces in made the job a lot more fiddly and time-consuming. Finally, though, just as it was getting dark, we had a floor. Thank goodness, as we were all exhausted by this point. The final thing we did was attach the polythene sheet by stapling it on down the sides, to protect our shiny new floor!

Slightly shinier with bits of plywood stuck to it…

We made good progress on the floor this weekend, although, to the casual observer, it may seem as though not much has changed.

As Joe so nicely put it, the trailer now “looks slightly shinier with bits of plywood stuck to it.” However, the floor joists have now been properly reinforced (some would say we over-engineered the reinforcing, however in my opinion, if something is designed to be moved around, it can’t be too strong!). The other important thing we needed to get done was more rust protection – the guy that made our trailer forgot to rust protect the welds, which had actually picked up a surprising amount in the short amount of time the trailer has been parked at the site. Our first job was to un-bolt all the joists which we had bolted on last week and grind the rust off the welds, before protecting them with galv touch-up and silver zinc spray.

While the joists were off, we took the opportunity to reinforce them with some structural plywood Tom had bought. There were a few knots in the timber which we just wanted to make sure would hold under the strain of moving the house around. This also allowed me to have some hammering practice.

In order to cut the plywood, Tom had to set up his brand new table saw. This, of course, was an opportunity for Joe and Tom to prove how good they were at putting things together without instructions…

After the joists were reinforced and put back into place, it was dwang time! We put dwangs down the centre and both sides of the joists, and then cut and fit in the siding on the outsides. The siding was in 2 pieces and had to be cut to 45 degree angles which slotted into each other. Cue a blonde moment from me, who almost cut to the tip of the long edge rather than the short one! Luckily Tom caught me before I could ruin a whole 8m piece of timber!

Another thing I did while the boys were dwang-ing was to sand down and repaint the window that got left out in the rain last week. Although this was time consuming, it was a worthwhile job and I was much happier with the end result. I decided to leave the outside of the windows just with primer on until after they are installed, to save any more unnecessary chipping. Again, I really cannot stress this enough: don’t spray paint if it’s about to rain.

Once the siding was on, Tom and Joe went underneath the trailer and stapled some strapping on to the bottom of the joists to pop the insulation on top of. Then, for once, we’d actually ran out of things to do! We had some outgoing plumbing to install, but Tom realised he didn’t have a correctly sized drill bit for this. So, we decided to call it a day at about 2pm and head off for a cold beer and a relax before dinner. Hopefully next weekend we will get the floor finished up. Tom also managed to get some bargain insulation for the walls off Trademe on Sunday night (although it is secondhand so might be compressed a bit).

A whole trailer-load of Batts for $10!

After we have insulted the floor and plumbed in the outgoing pipes, we will oil some un-treated ply and lay our floor down!

Construction has begun!

Before I started writing about what we have been up to the last couple of weeks, I of course had to mention the horrible events in our city this week. There is nothing I can say that hasn’t been said already, I can only express the sentiment of how deeply sorry we all feel. The lives that were taken we an absolute tragedy, and I cannot begin to put into words the sick sadness I felt when reading about the beautiful people that were in the mosque on Friday. I have been deliberating over what to say in this post, whether to post at all, whether to express things on social media, as I’m sure many others have. In the end, I decided not to post on mainstream media sites such as Facebook or Instagram, as, although there has been a lot of love and support, it was also the chosen platform of the offender, who I am trying to give as little of a voice to as possible. The fact that this happened a couple of streets away from us is absolutely surreal, and, although I do not personally know the victims, the impact it has had on our community has been huge. The main thing I am taking away from it is we are bigger than the hate; there has been nothing but an outpouring of love and support for the community as far as I am concerned. It is a horrible thing that has happened, but the extraordinary people of Christchurch will band together, as we have done before, and come through this hand in hand.

The other really sad thing that has happened in my life over the last couple of weeks is the passing of my wonderful Nan. This has been a really hard time, as she was very special to us. She was in England, which made things difficult, however due to technology, we managed to say goodbye to her. I know she would have been proud of whatever we were doing, and, although I didn’t get to tell her about the project before she passed away, I know she would have been supportive, as she always was.

So, during this time of sadness, the tiny house project has continued. It has been somewhat of a refuge to me, a distraction of sorts from everything else that is going on, and has given both of us something positive to focus on. We spent our first night staying in the caravan that Tom’s mum kindly provided for us, which was a cosy retreat after a hard day’s work. The food was a bit of a fail – we tried spaghetti, jam and cheese; I left the cheese in the fridge at home and both the jam and spaghetti had gone off! We ended up with rations of crisps and one square meals.

An exotic breakfast

Tom has also been doing some work sorting out some facilities for us at the site. I am pleased to report that we now have a fully functioning shower and composting toilet! The gas califont and water pump Tom purchased work really well, and we have a good pressure, hot shower to use ar the end of the day – an absolute luxury! Our composting toilet is from Seperatt, we did not buy the entire unit, but instead bought a urine seperator, which is currently plumbed into the ground away from the site. We have started a compost for the back-end operations, which will be mixed with sawdust. For protection and privacy, we decided a couple of shower tents would be easiest.

So – the actual progress! For the last couple of weeks, I have been working on refurbishing a couple of windows we got secondhand. The new windows we purchased from Colin at Eco Cottages are all white and shiny-new. The secondhand ones are from a yard, and were pretty filthy and not white when we attained them. I have been working towards cleaning them up and re-spraying them, hopefully will be able to share the finished product in a week or two (it is a slow process due to drying time). I used an excellent how-to video from the Bunnings website to do this, however I still made a couple of mistakes during the process. The first was pretty simple: don’t spray paint when it’s about to rain! One of the frames got rain spots on it, which I am still in the process of trying to strip and re-paint. The other silly thing I did was to paint the outside of one of the frames first. The inside is protected by the wood reveals, but the outside was exposed, so after I had painted this, it got laid down paint-side first and a couple of chips have appeared. Guess I’ll be doing some re-spraying next time. Lesson learnt: paint the insides first!

Link from Bunnings Warehouse: https://m.youtube.com/watch?v=GRpQlIuJFV0

We also got started on the construction work this weekend, along with a friend, Joe, who kindly offered his services for the day. Over the course of the weekend, we managed to get the floor joists bolted to the trailer – a big job which we were very glad to comleted in a couple of days. The first afternoon was spent measuring and cutting the timber to length, and the second day was lining up the joists on the trailer and bolting them down. They had to stick out exactly the same amount on each side, which was rather tricky, as the trailer isn’t the exact same width all the way down. This involved a LOT of measuring and re-measuring from the more perfectionist half of our team (Tom was getting a teeny bit frustrated and just wanting to bolt the things on by the end of it). We got there in the end though. The end of our day was spent popping down to see our neighbour’s yurt which they had erected and furnished that week. It looked AMAZING, and the fire in it was so cosy! Definitely a feel-good space!

So Tom was very excited on the the way home on Sunday, and began to talk about “getting the walls on” next weekend. A phone call to his dad revealed otherwise. We have to move the end joists so they stick out over the trailer and will stop any water getting down onto it and rusting it in the long-term. We also have to put dwangs down the joists to support them, and extra supports into place for our second storey. The other job we have to do is coat the top of the trailer welds with rust protection – turns out the guy that built the trailer did the sides but not the top, which is already showing signs of rust. So, we have to un-bolt all the joists and put them back on again to scrape and treat the top of the welds (wish we had made this decision BEFORE we bolted on all the joists but you live and learn). So, bring on the next weekend!

Skiing and Boarding in Japan

Slightly off-topic post this week, but something I felt I should share, as it is part of the “lifestyle” we are aiming for. We went off on a two week trip to Japan to ski and board. This was an absolutely amazing experience! We flew in to Tokyo, before catching the train to the ski town of Hakuba the next day. The first night, we stayed at the Hakuba Alps Backpackers. Then, we moved into one of their cottages for the rest of the trip. The accommodation was pretty basic, but good value for this area of Japan, at around $60 p/p, p/n. There was also a great bar right next door, owned by the same people, with cheap and cheerful food, and cheap drinks. We ended up eating here many nights of our holiday. As far as the town itself was concerned, the things I’d heard before going were fairly accurate.

  1. Ski towns are a lot more expensive than regular towns. This is generally true all over the world, and Japan is no exception. There are a few things you can do to get around this though, namely going to the 7/11, and sticking to Japanese food rather than Western food, which was exponentially more expensive. The ski passes themselves weren’t too badly priced, especially if you took into account the free shuttle buses operating between ski resorts every single day. However, the rental prices are ridiculous! We got around this by bringing our own gear and flying Qantas, who have an absurdly generous luggage allowance.
  2. The snow in Japan is absolutely fantastic. More on this later.
  3. Japanese accomodation is not always super well-built, so be prepared for the cold! It got down to about -10 in our bedroom some nights. The cottage we stayed in was not insulated, and the heating was from kerosene heaters. As the fumes from these are rather toxic, we turned ours off when we went to bed at night, deciding to put up with the cold instead. Many layers of clothing and blankets were needed. I also took the super-insulated slippers Tom got me along with me, and was SO GLAD of this decision. This also reinforced to me the importance of insulating our tiny home, many flashbacks to freezing cold student flats were experienced!
  4. Onsens are THE BEST. Especially after a long day on the slopes. Our local onsen had outside tubs that were exactly the right temperature to lie in with the snow falling all around you and wallow in utter bliss. And the whole being naked thing really isn’t that weird – Tom commented that he was sick of naked men by the end of the holiday but I would be perfectly content to use an onsen on a day-to-day basis. Maybe it would be different if you knew the other people using it, although the Japanese didn’t seem remotely bothered by this.
  5. Japanese whiskey is the best in the world. If you ever have the opportunity to try/ buy it, do it.
  6. Japanese food is also delicious. Definitely not just fish! I ate so much food while we were here. Could have lived off the pork buns at the 7/11. The street food is great (apart from one ski field sausage which was decidedly yuck), and the ramen places and cheap curries are to die for! I also did try tuna sashimi (the raw fish), which wasn’t actually too bad! The fried chicken from Lawson’s convenience stores is an absolute game changer, they had the best chicken nuggets I’ve ever had in my life! The thing I took away was try everything, it’s mostly delicious with a few hit and miss things, but the positives definitely outweigh the negatives!

Just outside of Hakuba

If you are a skier or boarder, I would recommend Japan as a must-do. After hitting the slopes in New Zealand for 4 seasons, I thought I was a pretty experienced snow bunny. However, Japan proved me very wrong! Between the trees, the powder and the miles and miles of empty territory to ski, it really was a snow-lover’s paradise! I think my skiing improved greatly over the 8 days we did, and it sure was tough on the legs! Powder skiing is one of the more physically difficult things I have done. Add in some trees to crash into and there is an extremely high sore body potential. I ended up upside down in many a tree, and Tom wound up with a broken snowboard on our second to last day (he managed to finish the trip with his bindings turned backwards). RIP.

We had a couple of days in Tokyo on the way back through to NZ. We caught the bullet train back, which was incredibly fast and smooth. The first day, we headed over to Harajuku. We went to an owl cafe, which was very cool, although I did feel a bit mean on the owls. It was a great chance to get up close and personal though. Tom fed them, which was quite entertaining as they had to fly over and perch on his arm as part of their “training”. There was also a bitey one, and two that loved face massages. After the cafe, we went into Harajuku itself, starting with one of the famous crepe places. You could have any flavour of crepe you wanted, from cheesecake to curry! Then we wandered through a street full of rainbows and sparkles and unicorns and candyfloss! It was a very cool place! After a few minutes, Tom had had enough and went off to find an Internet cafe, leaving the rest of us to look our fill and eat many, many snacks.

We spent the next day at Disneyland, which was PACKED. We got on four rides after spending all day there (with much complaining from Tom about queuing up, despite my attempts at eye spy)! The train ride to get there was insane too, we got on a “rush hour” train, which was about as packed as everyone says. It didn’t quite get to the point of the attendants having to shove people in, but they were there just in case.

For our final night in in Tokyo, we looked around and did a little bit of shopping, before hitting the world’s busiest crossing to get that generic tourist photo…

For our final day, the boys went off early to queue up for Michelin star ramen (which took a long time, from about 7am to 12pm altogether, although there was a ‘grab your ticket and come back later’ system which was quite a good idea). I decided to pass on the ramen and have a little more sleep beforehand the journey home (which turned out to be a good decision, as apparently it was “nothing special” according to the boys). Side note on our accommodation- we stayed in a capsule hotel for about $50 NZD per night which was amazing! Tom and I were in a “semi-double” capsule which sounded small but was actually surprisingly roomy. They had bathing rooms and locker rooms on other floors where you could store your stuff. I thought we might feel claustrophobic in the capsule, but there is only a curtain separating you from the hallway, so you are never completely shut in. All members of our group thought it was a great idea for accommodation, with more privacy and space than you would get at a hostel.

Then, it was time to go back home. We had two flights, with a 10 hour stopover in Melbourne in between. We had planned to go out into Melbourne during this time, however a we’d bought duty-free in Tokyo (including alcohol), so, as it turned out, we had to stay in the airport instead. None of us were too upset about this as we were rather exhausted from the traveling anyway (evidenced by the creepy photo our friend took of us sleeping).

So before we knew it, we were back in little old NZ! We had a great trip, and were incredibly lucky to go and experience the snow in a new place. After seeing the style in which the Japanese live and staying in some cool places such as the capsule hotel, I am even more excited about our tiny house project. The Japanese people do living in and innovating small spaces very well (especially in Tokyo), and this is a way of life and culture I am hoping to take into our project. It’s also a great thought that with the money we will save on rent, we can hopefully go and experience more amazing places.

Toilets and Timber

This week, we have received our composting toilet system, and had a timber delivery!

Instead of going with the complete package composting toilet, we decided to go with components from Separett, who provide the seat and separator attachments, without the bucket for underneath or the actual “toilet body”. This ensured our cost was about $300, rather than others on the market which get up to almost $2000. It still includes all the main concepts of the composting toilet, with the idea that you finish putting it together yourself (therefore saving a considerable amount of money). My eventual idea is to build it into a box-type solution when it goes into the tiny house so it looks nice and neat, however until we actually put it into the house, we are going to set it up on the build site to use in the meantime. Of course, to achieve this, it needs something to sit in. Tom delighted in hacking up an old chair to devise his own solution to this…

P.S. The bucket underneath is obviously just to show the concept, we aren’t actually going to use it for waste 😂

Tom felt the need to demonstrate exactly how the toilet works…

Another thing that has been going on in the background this week is moving flats. Since a couple of flatmates are moving cities, we have downsized into a smaller house. This means that we have not been able to spend as much time on our project as we would have liked lately, as we have had to attend viewings, fill out many application forms and pack the house up. This did mean, however, that we got the chance to do some valuable downsizing! Although we’ve probably still got a long way to go, a LOT of stuff has been taken to charity shops! We are also going to be a bit distracted over the next couple of weeks, going to Japan for a ski/ board trip! So, the week was spent packing for moving, packing for our trip, and cleaning the old place. We had a bit of a mad long weekend before we left for our trip, moving on the Friday, cleaning all day Saturday, then filleting our timber so it could dry over the time we are away! Luckily, we had a great team of helpers for all these activities, and the couple of hardworking flatmates that helped with the the timber used to work at a timber yard, so the process went super quickly and smoothly!

Fillet prep
Hard at work in 30 degrees
Time to head off for an ice cream after a job well done!

After going through the process of moving rental properties for the first time in 3 years, I am even more happy to be starting this project. The whole thing was a bit of a nightmare, from finding properties and applying for them, to moving and cleaning, and finally, the process of getting the bond back from our old landlords.Then, the property we moved in to inevitably had a few problems, and although the landlords were very good about getting these sorted, it will be lovely to have our own place to just sort out ourselves. The paperwork involved in commencing and ending tenancies is just insane, and some of the things they want to know on the property application forms are just incredibly nosy. Plus, having considered buying a house at one point, I’m pretty sure the credit checks for rental are more stringent than if you wanted to borrow half a million dollars to buy a house, which seems pretty wrong to me. The whole moving process was time-consuming and stressful, and, although we are now settled in our rental for the time being, I am happy that this will hopefully be the last time we have to go through that experience. Now that we are all moved in, we can spend a couple of weeks having fun in Japan, before cracking on with the project when we get home!